Monday, July 6, 2015

EXPANSION FROM CORE TO PERIPHERY, or AN INTRODUCTION TO SEATED FORWARD BENDS

There are two separate groupings of postures specifically focused on seated forward bends in Light on Yoga. The first is on pages 148-79, and herein are the most basic (and most commonly practiced) poses within this category including Janu Sirsasana (Head-toward-knee, 148-51), Ardha Baddha Padma Paschimottanasana (Half Bound Lotus Forward fold, 153-56), and Paschimottanasana (Seated Forward fold, 166-70), among others. The second (more advanced) set of seated forward bends is on pages 288-308. It begins with Kurmasana (Tortoise, 288-92), and grows increasingly more difficult as it proceeds through a series of poses in which one or both legs is hooked behind the head.

When we start to practice seated forward bends in class next week, it will be based on the poses presented in and around the first section, the more basic ones. I mention the more advanced set just to highlight a point. If you look closely, there exists an interesting (and I think significant) pattern and repetition of shape within the sections of poses preceding both sets of seated forward bends. The pattern is noteworthy because it both directly and indirectly informs the work of the seated forward bends. Let’s look at it.

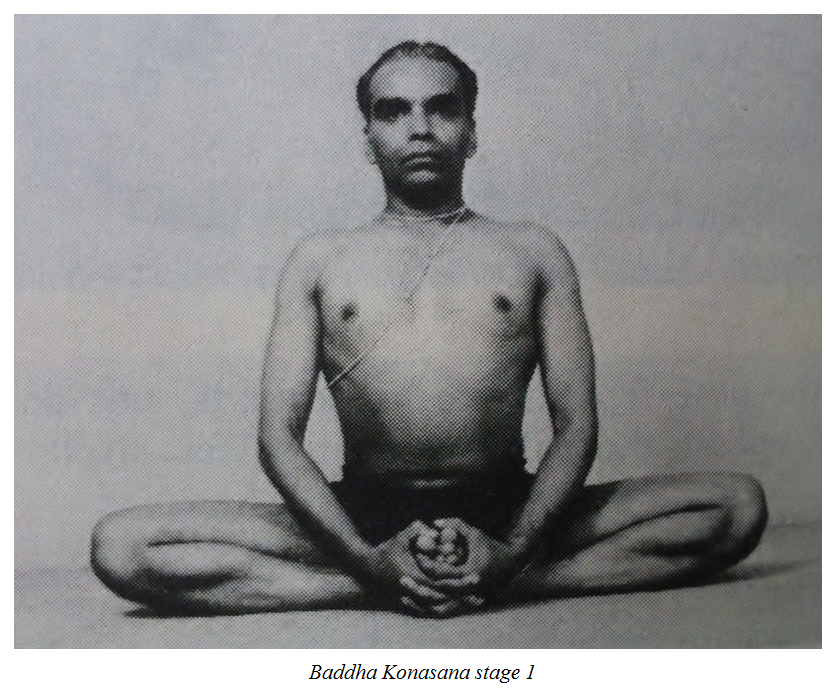
The sequence opens with a very long series of standing poses in which the major joints of the body (namely shoulders, spine, and hips) are taken through a full range of motion all with the feet and legs as the primary point of foundation (pages 61-99). The next section is an introduction to basic back bends (100-09). That is followed by a section of poses with two simultaneous agendas taking place: (1) creating stability in the core and the arms, and (2) creating mobility in the hips, knees, and ankles (110-148). Postures found here include Navasana (Boat, 113), Adho Mukha Svanasana (Downward-facing dog, 110-11), Virasana (Hero, 120-23), and Padmasana (Lotus, 129-32). Notice that these poses are nearly exclusively performed with the body seated upright and no more than 90-degrees of flexion at the hips. After that is the first of the two sets of seated forward bends (149-79).

Then all of that (or something strikingly similar to it) is repeated.

Standing poses aren’t seen again in a concentrated way. However, their primary function—taking the major joints of the body through a full range of motion utilizing a central, stable point of foundation—is. In a lot of ways, the Sirsasana and Sarvangasana cycles (Headstand and Shoulderstand, 179-237) are the inverse of the standing poses section. They repeat nearly every form which was introduced to the body in the very first section of postures, but here the foundation is the head or shoulders rather than the feet. For example, Salamba Sirsasana I (Supported Headstand I, 183) is the inversion of Tadasana (Mountain, 61), Parsvaikapada Sirsasana (Side One-legged Headstand, 202) is the inversion of Trikonasana (Triangle, 64), Halasana (Plow, 217) is the inversion of Uttanasana (Standing forward fold, 93), and Supta Konasana (Reclined Angle, 222) is the inversion of Prasarita Padottanasana (Wide-legged Forward fold, 83). And there’s more if you look carefully. Do you see the repetition of shape here; can you find a shape like Revolved Triangle in the inversions section? These sets of postures (standing, Headstand, and Shoulderstand), and their repetition of shapes, share a common and important purpose: to cultivate balance and stamina while conditioning the central axis of the body.

Following the original standing poses is a section of basic back bends. Many of those shapes are likewise repeated during the inversions section. The most explicit relationship is the similarities between Ustrasana (Camel, 88 [technically in the standing pose section]), Dhanurasana (Bow, 102) and Setu Bandha Sarvangasana (Bridge, 229), but you can find components of the basic back bends in a couple of other places throughout the inversions section if you pay close attention. Of course, gravity plays a different (more demanding) role here, and, therefore, the back bending postures within the inversions section are more challenging than those within the basic back bends section even though the shapes of the body are essentially the same. These poses are designed to make the spine strong. The spine must be strong before it can be flexible or you risk overstretching tissues and/or damaging joints.

After the inverted back bends is another round of focused-attention on simultaneously developing upper-body stability and lower-body mobility just like in the first half. Postures such as “UPP” (Leg-lifts, 240-42) and Vasisthasana (Side Plank, 309-11), for example, are the more challenging versions of postures seen earlier such as Navasana and Lolasana (Pendant, 116-17), each of which are designed to create strength and stability in the trunk and/or arms. Also here, the hips, knees, and ankles are taken into deeper ranges of flexibility with poses such as Ardha Matsyendrasana (Half-lord-of-the-fishes, 259-62) and Malasana (Garland, 262-66) which are similar to, but more challenging than, poses seen earlier such as Gomukhasana (Cow-face, 115) and Marichyasana I (Marichi’s twist, 160). Notice again that these poses are also nearly exclusively performed with the body seated upright and no more than 90-degrees of flexion at the hips. These shapes are direct preparation for the forward bends without the added stress which folding forward entails.

And, as I mentioned earlier, the second section of seated forward bends begins with Kurmasana, and is, overall, more challenging than the introduction to seated forward bends seen earlier in the sequence. However, the additional challenge is essentially proportionate to the difference between the standing shapes and the inverted shapes, or between the first set of hip-openers and the second.

So there’s the pattern. What does it mean?

Well, I think one way (not the only way, not the best way, just one way) to look at this pattern of events is as a deliberately gradual expansion of physical conditioning from the core of the body (i.e. the trunk or axial skeleton) to the periphery (i.e. the limbs or appendicular skeleton), and also from those poses which are the least to the most stressful.

Many of the seated forward bends target the most peripheral parts of the body—they require fine-tuned use of feet, ankles, knees, hands, wrists, and vertebrae (I don’t consider the spinal column to be part of the peripheral body, but the joints of the spinal column are vulnerable here in a way which is similar to the peripheral joints). So these distal, oft overlooked, and sensitive body parts are first placed into positions of atypical tension (bent, stretched, tucked, folded, rotated, clasped, etc.), and then the heavy trunk of the body is laid down on them to create additional compression. In other words, you compact and then you smoosh. That is a lot of physical stress for the body to undertake without diligent preliminary work. That is why seated forward bends come at the end of the pattern of sections within the sequence. They are poses designed to target the most peripheral parts of the body with the most amount of compressive stress.

On the other hand, standing poses (and their inverted cousins as well), target the most centrally-positioned parts at the core of the body. These poses help us understand the relationship between our body as a whole and space around us. They focus on big, “easy” to manipulate, “easy” to palpate parts in the middle of the body—stomach, ribs, chest, shoulders, and pelvis, for instance. They utilize fairly big and overt movements, and rely less on the more fine-tuned actions which show up in later postures. And, comparatively speaking, they include much less compressive stress on the peripheral body. They come first because we are naturally better equipped to access them in the early stages of practice.

The sections of postures which follow standing/inverting seem to gradually expand toward more and more acutely focused movements—broad areas of the trunk, then specific areas of the spine, then shoulders and arms, hips and thighs, and outward into the extremities. Along the way, more and more weight-bearing and joint-compression are being implemented. The body is slowly developing strength, stamina, mobility, suppleness, balance, and control in more and more localized places and particular ways. With each section of postures, you are learning more how to come into yourself, both physically and energetically, which is a necessary element of safe and effective seated forward bends. And how that happens is by conditioning the body from most-core/least-stressful to most-periphery/most-stressful until you have something like Vrksasana (Tree, 63) transformed into Marichyasana II (163), or Shoulderstand into Yoganidrasana (Sleeping Yogi, 306).

The sequence of events happens twice because you need the whole first set of postures as a solid foundation of physical conditioning for the body before you can move into the more challenging (although similarly shaped) variations which is the second set. You need each of the poses within their particular sections in that particular series of events. It’s like learning to play music—you learn individual notes, then you learn chords, then you learn a song, and each step along the way has its own patterns and purposes. Or how a child learns numbers and then learns how to multiply them. She learns 1, 2, 3, 4… first, and then 7, 14, 21, 28… She doesn’t have to learn all new numbers, only a different kind of pattern within the ones she already knows. You can’t multiply before you can count, and you can’t harmonize before you can pluck. Likewise, you can’t sit and fold before you can stand on your own two feet.

More on this soon…


The pattern summarized:

     1. standing poses (61-99, cultivate balance and stamina while conditioning the core axis of the body with the feet/legs serving as the foundation)

     2. basic back bends (99-109, stabilize and mobilize the body’s posterior chain of muscles)

     3. basic core- and arm-strengtheners plus basic hip-openers (110-47, develop strength in the upper-body and flexibility in the lower-body)

     4. first section of seated forward bends (147-79)

     5. inversions (179-237, cultivate balance and stamina while conditioning the core axis of the body with the head or shoulders serving as the foundation)
          *Sirsasana cycle: 179-205; Sarvangasana cycle: 205-37

     6. inverted back bends (continue to develop strength and flexibility in the body’s posterior chain of muscles via a shift in the relationship to gravity)
          *found throughout Sirsasana and Sarvangasana sections

     7. more challenging core- and arm-strengtheners plus deeper hip-openers (237-88, increase strength in the upper-body and flexibility in the lower-body)
          * two separate sections: (1) core-strength, leg- and hip-openers, and seated twists (237-76), and (2) arm-balances (277-88)

     8. second section of seated forward bends (288-308)


Can you see any repetition of shapes in these poses, and, therefore, how they could be part of a logical sequence of events?


Vrksasana to Marichyasana II


Salamba Sarvangasana I to Yoganidrasana

Tuesday, June 23, 2015

2 LINKS: UJJAYI PRANAYAMA BLOG ENTRY & B.K.S. IYENGAR ARTICLE

Click here for a short article and pictures from B.K.S. Iyengar's final photo shoot. Amazing!


Click here to read a piece entitled Breathe Right: Ujjayi Pranayama which I recently contributed to the "Live a Grounded Life" blog hosted by Solid Roots Yoga.

Enjoy! And, as always, let's practice together soon and often.


Wednesday, June 17, 2015

MORE HIP OPENERS, or INTRODUCTION TO WEEKS 19 & 20 SEQUENCE

Hip-opening has been the primary theme of the DK class in recent weeks. We took a kind of scenic tour into Padmasana by spending significant time in each of the postures immediately preceding Lotus pose in the text (Gomukhasana, Virasana, Bhekasana, etc.). While the work we have been doing is basic in nature (i.e. foundational and preliminarily necessary), it has not been easy or quick. What it has been, as far as I can tell from what I see and hear, is worthwhile and motivating.

Hip-opening postures have a way of being particularly provocative. So many yoga poses are focused specifically on either creating or utilizing hip flexibility. It is understandable that one would feel frustrated or intimidated if the range of motion in their hips was especially limited; it might seem as though a whole world of experience is inaccessible, off the map. Padmasana in particular is, for many yogis, the epitome of yogasana; the Lotus form is often viewed as the embodied definition of yoga. And it is common to have strong feelings of desire toward attaining it as well as strong feelings of insecurity or self-criticism when it is not achievable. Of course, no single yoga pose defines a practice or a practitioner. But a student, who is otherwise fully capable of reminding themselves of that when their steadiness waivers in a one-legged balance or when their back bend is a little more hexagonal than it is circular, is suddenly barreling toward an existential crisis when their legs resist the quintessential pretzel-y-ness of Lotus pose.

It is also a commonly held belief that all kinds of emotions and stresses (positive and negative, conscious and repressed) are bottled up and preserved in energetic states within our hips and pelvis. It’s like a rush hour traffic jam on the I-405 down there. Because of that, working with hip-opening postures often leads to big feelings, and not always ones that we welcome: frustration, fear, doubt, hesitation, impatience. Sometimes they result in an emotional release. Something which was jammed up or impinged suddenly breaks wide open and the force of the flow is unstoppable. You are suddenly overwhelmed with the desire to laugh out loud or cry or shout.

Those with sufficient hip mobility aren’t necessarily in the clear, however. There is often times an inverse relationship between mobility and stability wherein too much openness coincides with lack of strength. That tends to place the burden of stability on some other part of the body, and, in this case, that is typically the spine which stays overly tense and is easily fatigued. A person with ample range of motion in the hips likely faces a task as challenging as that of the too-tight person: toning the legs and hips in order to create appropriate boundaries against which the upper-body finds freedom. So the next time you’re enviously eying the person on the mat next to you whose Gumby-like legs appear to seamlessly fold and unfold, remember that it’s not that they have something you don’t have or are in some way better—that’s not a whole or accurate picture—rather their challenges are different than yours, and your strengths lay in different areas.

Yoga pose insecurities, emotive reactions which occur while on the mat, and the body’s way of compensating for tightness versus openness are each entire conversations in and of themselves, and I’ll resist elaborating on them any further here. For now, what I want to share is the set of poses which will be our focus in the upcoming weeks. They are still primarily hip-openers. However, whereas our recent work has seen a lot of attention on knee flexion, adduction and internal rotation of the legs, and spinal extension, now there will be more forward folding while one leg is straight and the other is maneuvered through a range of hip movements. We are being introduced to the first group of seated forward bends and twists. Of course, along the way, I’ll point out forms and functions, we will look at relationships and repetition of shape, and we’ll work through various stages of experience.

I am going to present the poses here in the order in which they appear in the Course 1 syllabus in the back of the book. That is certainly not the only way they can be sequenced and practiced. It is possible that any or all of them would need specific preparations and warm-ups beforehand. And, for any number of reasons, one or more of them may be inaccessible to you. I’m also including some of the poses from recent weeks as a reminder that this work is absolutely related, and should be a fluid continuation of where we have recently been. Moving forward toward new poses should be in addition to, not in replacement of, what has already taken place.

I recommend experimenting with the poses in between class times: try rearranging their order; try practicing all the lefts sides before the rights sides, and vice versa; try them raw without any warm up for your spine or legs; compare that to how it feels to add a few rounds of Sun Salutations, standing poses, or a series of reclining leg stretches and hip openers (like Supta Padangusthasana variations, Succirandhrasana, or Garuda’s twist) before the seated work; try them with lots of props and with no props. And feel free to add or remove anything that makes it an enjoyable experience for you. I might suggest closing with a Bridge pose or two, maybe Shoulderstand variations, and then a prop-supported Savasana. It’s your practice; make it work for you.


Virasana -- Hero (pay particular attention to the various foot positions)


Triangmukhaikapada Paschimottanasana -- Three Parts Facing West Forward fold


Ardha Baddha Padma Paschimottanasana -- Half Bound Lotus Forward fold


Marichyasana I -- Marichi's Twist I


Bharadvajasana I -- Bharadvaja's Twist I


Bharadvajasana II -- Bharadvaja's Twist II


Baddha Konasana -- Bound Angle


Gomukhasana -- Cow-face


Padmasana -- Lotus


Supta Virasana -- Reclined Hero


Marichyasana III -- Marichi's Twist III


Ardha Matsyendrasana I -- Half Lord-of-the-Fishes Twist I


Tuesday, June 2, 2015

MEMORIAL DAY, or YOGA AS AN ACT OF DECORATED CONTENTMENT

I know I am a little behind schedule. I didn’t get my thoughts written as quickly as I had hoped, so I’m wishing you a happy belated Memorial Day. I hope you were able to enjoy some of what it typically includes: the three or maybe even four day weekend, a celebration of the arrival of summer, perhaps some time outdoors with friends and family. I remember as a kid our school year always ended the week before Memorial Day, so the holiday weekend was our first big summer vacation event. It meant a Little League game in the morning (my younger brothers played), the neighborhood pool all afternoon, and then home for dinner which had been cooked on the backyard grill. And we repeated that schedule of events as many times as we could until August.

Interestingly, Memorial Day wasn’t given its currently recognized name and date on the calendar until after WWII. Before that, when it first began to gain popularity in the late nineteenth century, it was known as “Decoration Day,” because the day’s events included decorating the gravestones of war soldiers. It’s that part—the “decoration” part—that always rings in my ears.

To decorate means to embellish and adorn, to distinguish and honor. It shares the same Latin roots as the word “decent,” which is to make suitable and to be worthy. So, when we add that to the idea of acting in remembrance, a decoration becomes a dignified offering of mindfulness. It’s not just remembering something important; it’s doing so in a way that truly respects and preserves its goodness.

I think our yoga practices—and, by extension, each of us as individuals—deserve more decoration. Often times we treat yoga as a solution to a problem rather than an appreciation of the good. We notice, and then fixate on, something which we view as less than optimal about our body or our being. We feel weak and want to build strength, we feel stiff and want to loosen up, we feel sluggish and crave more energy, and so on. And it is true that we can receive an array of gifts and gains from a consistent practice. But what should be remembered is that we are not problems in need of being fixed, rather we are human beings deserving of recognition and affirmation. Yoga is a way to decorate your Self. It is a way to adorn who you are and what you have. And it’s a way to truly respect the goodness you always have been and always will be.

Really it is not until you can embrace and decorate yourself exactly the way you are that the gifts of practice become accessible to you. One of yoga’s first big lessons is developing self-awareness. You must be able to recognize yourself in order to know who you are and what you have right now. And then that recognition needs to be bolstered with acceptance and contentment; what we call “Santosha” in Sanskrit.

Santosha is one of Patanjali’s five internal disciplines or vows (along with integrity, austerity, self-guided study, and dedication), and, while it isn’t easy to cultivate, it is worth the effort. The “Yoga Sutra” says that contentment is a key to happiness. That is because it includes feelings of gratitude, plentifulness, security, and satisfaction. The alternative is to constantly swim up the stream of “more and better and different” which is exhausting and confusing. Therefore contentment is also a source of stress-relief and ego-reduction. It is sometimes misunderstood as naiveté or blind optimism, but it is actually more of a conscientious yielding. It isn’t ignoring or condoning bad behavior or poor choices, rather it is understanding the difference between what needs to be addressed and what is good enough just the way it is. Santosha is trust in your ability to discern between vice and virtue as well as your capacity to act accordingly. It is the ability to show yourself appreciation for your strengths and compassion for your weaknesses.

When you work in remembrance of your innate goodness; that is, with both self-awareness and self-satisfaction, you recognize your suitability and you respectfully adorn it. In that way, yoga is an act of decoration. It embellishes and augments the best parts of who you are. And that, by the way, includes the parts of you which are undergoing continued development.


(Image: Yoga Sutra II.32 and II.42 as translated by Chip Hartranft, 2003.)


Tuesday, May 26, 2015

LIGHT ON BADDHA KONASANA, or BOUND ANGLE AS A PEAK POSE

We did something different in class this last week—we practiced a sequence of asana that used Baddha Konasana (Bound Angle 128-29) as the peak pose. That might not sound terribly exciting or noteworthy, yet I find myself continuing to think about it several days afterward.

This is an undervalued posture that typically gets relegated to the sidelines. To the best of my memory, in ten years of teaching, I have never positioned it as the peak of a sequence, nor do I remember ever being led into it as a peak by another teacher. I have certainly practiced and taught it many times, but always as either a preparation for further hip-opening or as a counter/cool-down following back bends or inversions. I certainly enjoy and appreciate the pose, but I've never highlighted it. I think it’s time to put Baddha Konasana in the spotlight, and give it a chance to gift us all that it has to offer.

The reason why it became the peak for us this week is because we, as a class, are progressing through the series of poses immediately preceding Padmasana (131) in the text. For the last several weeks, we have focused intently and mostly individually (basically one week at a time) on Navasana variations, the deep adduction poses (Gomukhasana and Lolasana), and Virasana variations (including reclining and back bending). Baddha Konasana is the last pose in this particular (albeit unconventional, see pervious post) sequence before Padmasana, and I nearly skipped it as its own peak. I considered moving straight from Bhekasana to Padmasana and only including Baddha Konasana as a preparatory pose with Lotus as the peak. While that would have been more conventional, I am so glad that I decided otherwise.

Mr. Iyengar certainly seems to have been a fan of the pose. He dedicated half a page in the text to describing its positive effects, and says it benefits the elimination and reproduction organs of both men and women, it can be soothing for sciatica, and it can be used during pranayama and meditation practices. Seated forward folds in general, particularly “mild” ones like this, are considered to be calming and revitalizing for the nervous system, and they are associated with relieving minor back aches. It is equally respected and promoted in the Ashtanga system as well. There are three different variations of it practiced in the Primary Series. Not only is it considered an important posture in these major traditions, but it also shows up in both of their “short forms.” By that I mean that both LoY and the Primary Series have condensed versions (sometimes referred to as “short forms”) of their particular sequences that can be practiced when one doesn’t have sufficient time in which to practice the sequence in its entirety, and when you only have time to practice some of the poses, both traditions recommend retaining Baddha Konasana. Seated hip openers, Baddha Konasana included, are powerful poses, but they are not necessarily “easy” to practice. Baddha Konasana in particular requires a surprising amount of strength. It is a pose most often practiced for its ability to open and make flexible the hips, but in order to experience that, the core, spine, and outer thighs must be strong and stable. In that way, it becomes a deceptively challenging posture to practice well.

Speaking of strong core, spine, and thighs, if you notice the sequence in the text leading up to Baddha Konasna, you will see that there actually is a focus on those things prior to this pose. In fact, the focus in this section is two part: (1) upper body (torso / axial skeleton) strength and stability, as well as (2) lower body (hips down through feet) flexibility and mobility. And those happen to be two things you need a lot of in this pose. Starting back with Urdhva Mukha Svanasana (109) and Adho Mukha Svanasana (110) you get upper body stability. Then Dandasana, Paripurna Navasana, and Ardha Navasana (112-13) compliment that nicely and provide additional upper body stability. Gomukhasana (115) gives lower body mobility while Lolasana (117) combines stability with mobility. Siddhasana (120) is also a combination of stability (in order to sit straightly upright) and mobility (in order to properly fold the legs) although clearly much less intense than Lolasana, and similar to, but also less intense than, Baddha Konasana. Finally the Virasana variations (120-27) are definitely about lower body mobility (particularly feet and ankles), and the reclining and back bending variations (Supta Virasana, Paryankasana, and Bhekasana) further focus on lower body mobility while also incorporating upper body stability. Assuming all of that has gone well as a series of poses, the body should be well prepared for, and happy to receive, the tall and open shape of Bound Angle—the core, spine, and outer thighs should be capable of providing adequate supportiveness while the hips should be supple enough to release fairly readily into a combination of (moderately deep) external rotation and abduction.

Of course this isn’t the only way to prepare the body for this pose, and, in fact, we have talked before about this sequence being rather unconventional. I think it is a good sequence IF you are comfortable performing each of the poses in the sequence. If, however, any of those poses need to be their own peak experience for you with appropriate preparations and modifications beforehand, then using them as a specific means of getting toward Bound Angle may not be your best choice. It doesn’t make it bad or wrong, but it is possible that some other route, with some other sequence of poses, would better prepare you.

The following is the sequence we practiced together on Sunday with a few extras added in. Like the series of poses presented in the text, it is just one way (not the only, not the best, just one) to practice with Baddha Konasana as the peak pose. Feel free to add/subtract/modify/rearrange anything to fit your needs/desires; it can even be turned into a flow-style practice if you like. I’m not providing how-to instructions here for form or alignment (just a list of pose names), so if some pose is unfamiliar to you, skip it, replace it, or Google it. I might suggest trying both of these sequences (the one from LoY and the one shared here), and just experiment with your body. Notice challenging moments and easeful moments, what works and what doesn’t, and how you feel afterward. There isn’t a right or a wrong; only two different ways to get to the same place—with much deserved light on Baddha Konasana.


Props: a wall, a strap, 2 blocks (preferably 4”)

[Reclined hip and leg openers]
wind-shield wiper twist/stretch
Succirandhrasana (thread-the-needle)
Garuda’s (Eagle pose legs) twist

     repeat wind-shield wipers, Succir., and Garuda’s twist a second time on each side

Ekapada puvanna muktasana (“EPPM,” hug one knee to chest and then to armpit)
Supta Padangusthasana I prep. (reclining hand-to-big-toe pose variation with hands clasped behind top thigh)
Supta Padangusthasana I fuller form with a strap or hold on to big toe

     repeat EPPM, Supta P. prep., and Supta P. a second time on each side

Supta Padangusthasana variation with top leg extended out to side, and a BIG external rotation to the top leg

Supta Padangusthasana variation with top leg out to side, a big external rotation, then bend your knee to bring the heel toward your groin for a reclined variation of one-legged Bound Angle, then position the top leg into Half Lotus, and finally bend the bottom knee for a Half Lotus variation of Thread-the-needle

[Standing poses]
Downward-facing dog (AMS)
walk hands back to Uttanasana
Tadasana

Uttanasana, walk hands out to AMS
vinyasa
AMS lunge (“down dog lunge”) each side
Lizard lunge (forearms down) each side
AMS to Uttanasana
Tadasana

Utkatasana to Uttanasana
Garudasana legs
     repeat Garudasana either just legs or add the arms for the second round
Uttanasana
vinyasa and take 2 extra breaths during Upward-facing dog

[Seated hip openers]
Gomukhasana legs
     repeat Gomukhasana either just legs or add the arms for the second round
Virasana, practice all four feet positions as presented in the text
Supta Virasana
Paryankasana with one block under each shoulder blade, practice with straight legs if Hero legs are uncomfortable
AMS with strong, straight legs; no pedaling or fidgeting

Agnistambhasana (Fire log pose)
Siddhasana at the wall with a block positioned behind your upper back; stay for 2-5 minutes
Upavistha Konasana at the wall with a block positioned behind your upper back; stay for 2-5 minutes

Baddha Konasana at the wall with a block positioned behind your upper back; stay for 2-5 minutes
Baddha Konasana with a block between your feet; press your feet together firmly and sit up tall as if the block were still behind your back
     1. with block positioned so that its widest edges separate the feet, stay for 1 minute
     2. with block positioned so that its medium edges separate the feet, stay for 1 minute
     3. with block positioned so that its narrowest edges separate the feet, stay for 1 minute
Now try Baddha Konasana without the block
If your hips feel open and your knees are on (or very close to) the floor, fold and stretch your spine forward to bring your chin to (or toward) the floor in front of your feet

[closing and resting poses]
Bharadvajasana I and/or II
Janu Sirsasana
Setu Bandha Sarvangasana (Bridge pose)
reclined twist of choice

Savasana


Iyengar, B.K.S., Yoga Wisdom & Practice: For health, happiness, and a better world. London: DK, 2009. Print.


Thursday, May 7, 2015

KULA--CONTACT YOGA

Click here to read a piece entitled Kula--Contact Yoga which I recently contributed to the "Live a Grounded Life" blog hosted by Solid Roots Yoga.

Enjoy! And, as always, let's practice together soon and often.

Saturday, May 2, 2015

UNCONVENTIONAL SEQUENCING, or HOW UP-DOG AND HERO PREPARE YOU FOR LOTUS

My early relationship with Light on Yoga, like most people's, was as a kind of reference book. I didn't view it as a whole, as an ordered development of poses with a beginning, middle, and end. In fact, in some ways, it seemed entirely without order. When I had a question or curiosity about some particular posture, I would pick it up and flip right to the index. Then I would go to the page for that pose to look at its pictures and read its instructions, and that's it. It didn't occur to me to look at the pose(s) before or after. It didn't occur to me to look for patterns or sequences or to think of it as a self-contained practice. Instead it was almost like a phonebook of asana -- you don't read the phonebook from beginning to end; you go right to the information which is most relevant in that moment. In that way, LoY helped me connect to individual poses. I loved it for that. It wasn't until years later -- and over the slow course of several year's worth of time -- that I realized there was something much more deliberate and noteworthy in its organization. And that made me love it even more.

If you look closely there is a decipherable sequence within the book as a whole, but one that is only fully accessible to very experienced practitioners. In other words, one could use the book as a manual for a full-spectrum practice beginning with Tadasana and ending with Savasana with all of the asana from basics to advanced in between. But if you are not a very experienced practitioner capable of full-spectrum advanced postures, please do not discount the value of this book. There is a wealth of information in its pages -- some of it sits lightly on the surface ready to be known as soon as you crack it open while other parts are more deeply buried and are only discoverable to those who invest the effort and patience necessary to shine light on them.

Something accessible to all students, regardless of experience level or postural capacities, is the mini-sequences found throughout the text. They may not be immediately visible upon simply turning the pages. But they are there, and they're worth noticing.

There are lots of these so-called mini-sequences in the book, and I think the set of poses immediately prior to Padmasana (Lotus pose, 129-32) is particularly interesting. My experience as both a student and a teacher has often included lots of external rotation and abduction work as direct preparation for Lotus -- essentially all kinds of poses and variations of poses that encourage the inner thighs to stretch and widen; poses that mimic the basic form of Lotus's pretzel-y legs without the full intensity of that difficult position. That's a typical approach, and a reasonable one, as well.

However, that is not exactly the way it is presented in LoY. The sequence of poses preceding Lotus in the book includes a combination of core-strength and hip-opening. The hip-opening, though, isn't what you would expect. It is mostly internal rotation and adduction. Why would core-strength, internal thigh rotation, and adduction be placed just before Lotus pose? This is one of the reasons why the text sometimes seems disorderly rather than methodical. It is true that the sequence is unconventional, but it is not disorderly. There is a method embedded in the madness.

Let's consider this particular mini-sequence as starting with Urdhva Mukha Svanasana (Upward-facing Dog pose, 109) and ending with Padmasana. It would be as follows:

     Urdhva Mukha Svanasana (Upward-facing Dog pose, "UMS")

     Adho Mukha Svanasana (Downward-facing Dog pose, "AMS", 110)

     Dandasana (Staff pose, 112)

     Paripurna Navasana (Full Boat pose, 113)

     Ardha Navasana (Half Boat pose, 113)

     Gomukhasana (Cow-face pose, 115)

     Lolasana (Pendant pose, 117)

     Siddhasana (Adept's Seat pose, 120)

     Virasana (Hero pose, 121-23)

     Supta Virasana (Reclined Hero pose, 124)

     Paryankasana (Couch pose, 125)

     Bhekasana (Frog pose, 126-27)

     Baddha Konasana (Bound Angle pose, 128-30)

     Padmasana (Lotus pose)

In short, what is happening here is this set of poses is providing lower-body mobility (opening and loosening for the ankles, knees, and hips) while simultaneously creating torso strength and stability via the back bends and abdominal poses. Lotus pose, keep in mind, is meant to be used as a stable seated position for practicing pranayama (breath exercise) and meditation techniques. If the muscles of the torso, either along the belly or the spine, are weak, you will not be able to sit for any kind of prolonged practice period. And, of course, if your ankles, knees, or hips lack suppleness, you won't be able to get into the pose at all, let alone sustain it. Therefore, the poses immediately preceding Lotus pose provide the stability and mobility needed to be in the pose.

In case it still isn't entirely clear as to how all of that is happening here, I'll highlight a few specific points.

First, UMS, AMS, Staff pose, and Full Boat pose are strikingly similar when the form of the upper-body is considered. Look at them side by side:


Notice the shape of the chest in particular. With only a minimal repositioning of the arms and head along with a change in the relationship to gravity, these four poses have a lot in common. UMS and Staff pose are essentially identical with the exception that UMS places the legs in extension which makes the pose a back bend while the legs are flexed into a forward bend for Staff pose.


AMS, Staff pose, and Boat pose are essentially a single physical form interpreted three different ways relative to gravity.


These four poses (UMS, AMS, Staff, and Boat) are presented sequentially in the text, at least in part, because they are clearly related to one another in physical form. Each one provides a preparation or compliment for the one following. And they can easily be practiced in a continuous flow-style movement: from UMS, the hips lift and the chest presses back into AMS; from AMS, the legs jump through the arms to sit for Staff pose; from Staff pose, the body rocks back to balance on the buttocks for Boat pose; from Boat pose, the hands press into the floor next to the hips, the legs swing back through the arms, and the chest lifts for UMS; and so on. In other words, not only are these poses really important individually, but this mini-sequence is also the beginning of the Sun Salutation components. This is the first place that LoY presents a kind of "vinyasa."

The next pose is Ardha Navasana (Half Boat pose) which provides additional core strengthening. It is a more intense version of Full Boat. What make it more difficult is the clasp of the arms behind the head plus the repositioning of the torso and legs much closer to the ground. But those characteristics are what makes it so effective -- they challenge the muscle groups in a different way than Full Boat. Also the abdominal strengthening postures are included here to prepare you, in part, for the inversions that are not far away when the sequence is viewed as a whole.

Gomukhasana (Cow-face pose) takes a break from the strong core work, but not for long. Here is the beginning of more focused attention on the mobility of the hips, knees, and ankles. The standing poses, belly-down back bends, and core work that precede this pose emphasize generating heat and stability. This is something a little different: it highlights stretching and flexibility more so than strength. And it serves as a transition pose between what has already happened and what is about to happen. By combining the stability of the UMS arms and Staff pose spine with the strength of the Boat pose abdomen and the bendy Cow-face legs, you get the next pose: Lolasana (Pendant pose).


Pendant pose is the first of many arm-balances presented in the text. And, not only is it the peak at the end of its own mini-sequence (UMS + Staff + Boat + Cow-face = Pendant), it is also another component of the traditional Sun Salutation insofar as it prepares you to jump and swing the legs either forward or backward through the arms.

Mobility in the hips, knees, and ankles continues to be the primary focus in the next pose which is Siddhasana (Adept's Seat pose). But, different from the previous poses, now we see the first posture which utilizes external rotation and abduction at the hips. In this way, it is both a kind of counter-pose to what preceded it (Cow-face and Pendant both position the legs in internal rotation and adduction) as well as a sneak-peak into what is developing.


After that brief break, we go back to the internal rotation and adduction position of the hips and legs to practice several different stages of Virasana (Hero pose), and the focus is still on mobility in the hips, knees, and ankles. The deep flexion of the knees, the stretch for the ankles, and the upper-body seated on the feet in this way make Hero pose similar to Cow-face pose.


But the adduction of the thighs is lessened in Hero pose making it less intense for the hips. Notice that in Cow-face the legs are crossed above the knees so that the thighs move beyond the midline whereas in Hero pose the thighs are joined at the midline. In some ways, it would make sense to place Cow-face after Hero pose as it is a more difficult position for the legs, and therefore Hero could serve as a preparation for Cow-face. You certainly could do that. However, the advantage of practicing Cow-face first is that the challenge of Hero pose is greatly dissipated if you have already prepared the hips in the more extreme form; that is to say, if you can comfortably practice Cow-face legs, then you can surely practice Hero legs as the latter is less demanding. And, if by the time you enter Hero pose, your hips and knees are adequately prepared, you can focus your attention on other important components of the posture, such as the feet and upper-body.


There are four different positions for the feet in Hero pose, and each one provides a slightly different stretch for the lower legs, particularly the ankles. The final form is when the feet rest on either side of the hips (rather than underneath them) and are pointed straight back so that the inner and outer ankles are equally extended. At this point the upper-body experiences four additional stages of Hero pose.

After the forward folded stages of Hero pose come the supine stages known as Supta Virasana (Reclined Hero pose) and Paryankasana (Couch pose). These two poses continue the theme of ankle, knee, and hip mobility, and they add a focus of stretching the hip-flexor muscles along the front of the thighs and into the lower abdomen. Tightness in the hip-flexors will prevent the femur bone from sitting properly inside the hip-socket. If the femur bone is improperly positioned, it will limit your ability to fold the legs into Lotus pose. So even though these poses don't much resemble Lotus in their physical form, practicing them first is a huge part of preparing for it.


Then, you simply flip over to a prone position and repeat the same basic form while on your belly for Bhekasana (Frog pose). It continues to open the hip-flexors and strengthen the spine, and the contact of the hands against the top of the feet further stretches the ankles in cotninued preparation for Lotus pose.


Similar to Siddhasana seen earlier in this sequence, Baddha Konasana (Bound Angle pose) serves as both a counter-pose to what has just taken place (the deep internal rotation, adduction, and hip-flexion of the Hero pose variations) as well as a sneak-peak at what follows (Lotus pose is next). All of the preceding attention to the hips, knees, and ankles has presumably prepared the body to achieve this mild hip-opener with relative ease. At this point, the lower body is quite supple, any pressure otherwise experienced in the ankles or knees has likely been relieved, and, not only do the thighs open easily now that they are properly positioned within the hip-socket, it probably feels very good to allow them to do so. Of course, if you got to this point and didn't feel supple in the hips, knees, or ankles, then you probably would not want to proceed into Lotus pose.

The only posture left is the peak of our mini-sequence: Padmasana. Utilizing everything we have covered up to this point -- stable spine, uplifted chest and upper-back, strong belly, open hips, bendy knees, and mobile ankles -- each foot is carefully positioned over the top of the opposite thigh to create Lotus pose.


You can certainly see the similarities between Siddhasana, Baddha Konasana, and Padmasana, and why they would commonly be used as preparations for each other.


And it is understandable that the direct correlation between Hero pose and Lotus pose is often overlooked. They don't appear at first to have that much in common. But if you look closely, you can see traces of Hero legs in Lotus legs. And, of course, their relationship makes much more sense when viewed from the context of the particular sequences of events we just explored.


Again, this is definitely not the most conventional means of sequencing Lotus pose. And it probably isn't the best way to initially learn the pose. This particular sequence is probably most effective for those people for whom these poses are already well-established. They can each be broken down and their component parts better understood by placing them in other postural arrangements. Then this unique mini-sequence can be explored and experimented with.

As I mentioned earlier, Lotus pose is often used during pranayama and meditation practice, and for that you want the body to be as comfortable and stress-free as possible. That makes a build-up to Lotus itself a fantastic peak-pose sequence. But, of course, this isn't the end of sequencing in the book. Now that Lotus pose has entered the practice, it plays a major role in many of the subsequent asana. The next section of the book revisits most of the basic forms we were just introduced to but now with Lotus legs -- arm-balancing (Tolasana and Kukkutasana), back bending (Simhasana and Matsyasana), forward folding (Baddha Padmasana), etc. Then, all of that hip-opening is utilized in a series of poses focused on basic forward folding techniques. Following that, Lotus legs shows up again in several variations of inversions, more challenging arm-balances, and deeper forward bends later on, all of which have their own mini-sequences embedded within.

This short thirty-page section alone is rich and deep with work that could keep us studying for a very long time. As you see, not only are the individual poses essential for their own sakes, there are sequences inside of sequences which have the potential to unlock all new avenues of understanding and awareness and experiences.

Barring any limitations which would prevent a safe practice, I encourage you to try this mini-sequence and see how your body responds to it. Or find your own mini-sequence to play with. As a whole, LoY may not be conventional in its sequential presentation, but it does have order. And sometimes the unconventional approach takes you exactly where you wanted to go all along, just in a brand new way.